Awesome Web Blog

Implement Likes Rails With AJAX Using Acts as Votable Gem

| Comments

Why this Gem

Thanks to Ryan T, without his idea, it will be diffcult. Acts as votable is a gem deals with voting mechanisms, like and unlike things etc, pretyy cool isn’t it right.This blog is only a simple idea to use this gem, for more advanced ones you can go to the

github link

Add Gem to Rails Project

to fetch the latest version, rubygems acts as votable copy the gem and add to our project Gemfile
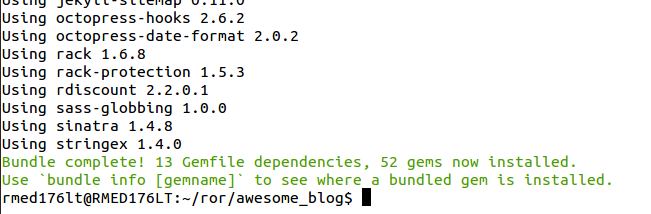
then run

    bundle install

create a migration for the acts_as_votable

In order to save the votes and its depanancies, needed a table, Thanks to Gem, they will create automatically when we run the migration, Run the command in the Terminal.

  rails generate acts_as_votable:migration
    bundle exe rails db:migrate

Use case in Project

The Project here I have here is the blog project which contains the Article model and User model. The User able to like an article. By Using AJAX , there is no need to refresh the page. so in the Article model add

    acts_as_votable

Also add the voter to User model Also,

    acts_as_voter

ADD the Corresponding Action in the controller

In order to work, we need to create an action in the controller, here in my case, there is ArticlesController, what we are doing is create a new action called like

Will explain the codes here below

since we are only implementing here, we need to add the table which user likes the article, for that , the built-in from gem is the “upvote_from”. current_user is the devise_helper to fetch the logined user. @article is an instance of the article page.

ADD the Routes

Since the like is the custom action, what we need is the new routes in the article and it is a PUT Action.Also each like belongs to a single article, so we are implementing is the member action under the articles

Create a template corresponding to Like action

We are using AJAX to update the count of likes, this will need a like.js.haml needed inside app/views/articles/

contents are

Right now, the code does not make any sense. since I am following HAML logic, a little bit different than ERB ones. the #like-count is the div id, what we have used here is , after liking, we updated the count of likes to #like-count div. get_upvotes.size is the helper to fetch the count of likes for the corresponding article.

Like button in the UI

will check the routes is everything all okay,

Ahh!, All set, now add the route path in the page where like button needed, I have added a like.png image in assets to look like social media button. also a CSS class to reduce the image size, if you needed add that or just discard that.

ADD the Div id to update the count of like

We have mentioned and id = #like-count in the lik.js.haml, need to add that in any place we can show the count of like. In my example, i have a glyphicon to show that before that i added it like below.

Will Explain the codes below

when the page intially loaded acts_votable gem called “get_upvotes” will fetch all the likes and show in the page, after that, if any likee from user, then the system Will AJAX and there by calling the like.js.haml and update the new count via AJAX.

All completed, now the output, will show you, like button

like count image

Note: the count shows as 2 because, I liked 2 times from 2 different accounts, actually there will like only one like per account per article, the gem is intellegent as it is ,again Thanks to Ryan T for this, If you have show stoppers, please check the code in

github

thanks Guys.

Implement Rspec in ROR Project

| Comments

Rspec, A Brief

Below is the some syntaxes and errors i have encountered when using rspec, I have shared here for every ones' use.

install rspec

install the rspec gem using the below command

  gem install rspec

create a test Group

  group :test do
    gem 'codeclimate-test-reporter', '~> 1.0.0'
    gem 'database_cleaner', '~> 1.5'
    gem 'factory_bot', '~> 4.8', '>= 4.8.2'
    gem 'factory_bot_rails'
    gem 'faker', '~> 1.6.1'
    gem 'rails-controller-testing', '~> 0.0.3'
    gem 'rspec', '~> 3.6'
    gem 'shoulda-matchers'
    gem 'simplecov'
  end

the gem factory_girl is deprecated right now, so we are using the factory_bot instead.

Add rspec-rails to the Development Group

  gem 'rspec-rails'

Now we need to add the development, test group

Intialise the folders for Rspec

achieved using the below command

   rspec --init

Require rspec/rails to spec helper

  require 'rspec/rails'

need to add above command to the spec_helper

You are Go

All set, now delete the test/ folder in the project and create the specs in models and ccontrollers

to generate rspec file for existing controller

  rails generate rspec:controller Controller_name

to generate rspec file for exising model

  rails generate rspec:model model_name

setup test database

Do the below step only if you don’t have the test database created

  rake db:test:prepare

Why we need the database cleaner

Is a useful tool to clear the dB from the test database. for that need to use the database_cleaner gem in test group.

  1. add the gem

    gem 'database_cleaner'
    
  2. require in spec_helper

    require 'database_cleaner'
    
  3. add the tables where clearing is needed

    DatabaseCleaner.strategy = :truncation, { :only => %w[users] }
    

    here users is one table, multiple tables can be added using comma

  4. Call the action

add the below line where we need to clean the dB

  DatabaseCleaner.clean

Note: in psql manually create test database and do rake db:migrate RAILS_ENV=test

Important Points to remember

  1. To clear all the data

add the below line to the spec_helper

  config.after :all do
   ActiveRecord::Base.subclasses.each(&:delete_all)
  end

2.To view the console of test dB

  rails c test
  1. If below Error comes up

    undefined method `sign_in' for #<RSpec::Core:

    Solution

    add below line to spec_helper

    config.include Devise::TestHelpers, type: :controller
    
  2. If below error pops Up

    rmed176lt@RMED176LT:~/ror/12-week/wiki_clone$ bundle exec rails generate rspec:install Running via Spring preloader in process 10346 Could not find generator ‘rspec:install’. Maybe you meant ‘devise:install’, ‘responders:install’ or ‘simple_form:install’ Run rails generate --help for more options.

    Solution

    visit link for SO answer

  3. If below error pops up

1) ArticlesController redirect to user signin Failure/Error: get :index

   NoMethodError:
     undefined method `get' for #<RSpec::ExampleGroups::ArticlesController:0xb8c4f8c>
     Did you mean?  gets
                    gem
   # ./spec/controllers/articles_controller_spec.rb:6:in `block (2 levels) in <top (required)>'

Finished in 0.00479 seconds (files took 4.41 seconds to load) 1 example, 1 failure

Failed examples:

rspec ./spec/controllers/articles_controller_spec.rb:5 # ArticlesController redirect to user signin

Solution

  1. need to add require ‘rspec/rails’ in spec_helper
  2. if wont work then add below line config.infer_spec_type_from_file_location! for me, 2 nd one is not required.

below is sample spec_helper.rb

Create a Blog With Octopress

| Comments

Why Blogging

Most of us are very much interested to write the blog to share what we think and to express our ideas to the world. But in reality, it won’t work. Sometimes Lazy attitude and lack of knowlegde about how to blog. Thanks to Ruby We have Awesome tool called Jekyll to blog.

What is a Jekyll.

Jeykyll is a static, simple blog aware site generator out of ruby. It is the one of the most trending repos of ruby in gthub.There are a lot of customisations in the jekyll; when we look it for the first time, we dont understand it very well.Same experiance for me too, but I don’t give up. I learned more about that and I came up with Octopress.

github link for jekyll

What is Octopress

First of all, Octopress is a blogging framework for hackers built on top of jekyll. It has awesome theme with nice understanding workflow for a newbee.

What we need

  1. Github account
  2. undertstanding about Ruby Programing language
  3. YML and kind of thigs
  4. Any IDE like Sublime Text

Setup Github

The reason I like GitHub it is super cool and provides free services. We can create public repos free and there is a place for static page too. In order to that need to create a repo name like this github-user-name.github.io. github-user-name is the username of your GitHub. Suppose your username is awesome.Repo name is awesome.github.io

Create new repository

for test purpose used a repo named user-name.github.io, here i have used awesome.github.io

make sure it is a public repository and create repository. since already have a github.io in my account, I cant use that refer to this answer in stackoverflow. refer link for details.All done from th github account.

Setup the octopress.

Refer using the link

  1. before installing octopress, make sure we have the ruby, git installed in our system.

  2. clone the octopress using below git url

1
git clone git://github.com/imathis/octopress.git awesome_blog
  1. Change to the directory awesome_blog

4.set the ruby version using rvm

5.install the bundler using below command

1
gem install bundler

6.then bundle install

7.octopress is bundled with default theme, we can customise later, for now, we will use the default theme.

1
rake install

linking GitHub account with Octopress

To do that we need to run this code.

1
rake setup_github_pages

It is actually a rake task will ask the GitHub URL Repo. here we have

1
git@github.com:anoobbava/awesome.github.io.git

Also it creates a new remote called octopress. A new branch source is created which contains the updations from our side where as the master contains the static page.

Now the process we need to generate a static page from this code, this can be achived using below command.

1
rake generate

push this generated static site to the github using the command.

1
rake deploy

Now the page is deployed, but the changes are still in the local machine we need to push to source branch. Which is achieved by

1
2
3
  git add .
  git commit -m 'commit msg'
  git push origin source

Note to remember: The static page deployed in the master branch and the code that we changed need to be pushed to source branch.

when we done any changes, and need this change in the production, so the below commands to be executed after every changes occurs.

1
2
  rake generate
  rake deploy

7.png

I have an existing user-name.github.io with account, So i can’t create an another one. So I will be explain about the existing github.io account.

Write a Blog using Octopress

For that I have switched to my account, you guys can use the user-name.github.io account.

Create a new post using below command.

 rake new_post["post_name"]

Before creating a blog post, We need to understand that this rake will generate a file in a markdown format and this markdown file will be end with YYYY-MM-DD-post-title.markdown and the path is in source/_posts.

Here I am creating a blog of how to create a blog using octopress and github.

The above rake will create a YAML based file which contains below details

1
2
3
4
5
6
7
---
layout: post
title: "Create a Blogging site using Octopress and GitHub"
date: 2017-11-14 19:20:57 +0530
comments: true
categories: 
---

All the things are bit straight forward ,only doubt comes from comments: true and the categories. Comments will be discussed later, categories means which all categories this blog will comes, we can provide multiple ones, here I am using below ones only.

1
categories: [Ruby, octopress]

Now we need to test what is the result is going to come, achieved by using below commands,

1
2
rake generate # will make the static file
rake preview # generate a localhost:4000 web browser and we can preview file.

Browser result

If we don’t want the file to be published and we need to do some path works and design and something and you are in the middle of the blog, then set the

1
published: false

to the blog post and it will not publish the page to the blogging site example:

1
2
3
4
5
6
7
blog yml
layout: post
title: "Create a Blogging site using Octopress and GitHub"
date: 2017-11-14 19:20:57 +0530
comments: true
categories: [Ruby, octopress]
published: false

then refresh the browser, Hooray the new blog is disappeard.

Sharing code and highlights

we can use using tilde “~” symbols for this option.The below option is achived using 3 tilde in one line, then in the next line data and in the next line 3 symbols

1
You are Awesome

Display images inside the blog

  1. Place the image in to the blog path/source/images/ 2.better to keep a folder for each blog posts inside the images/
1
2
syntax: {"%img /images/blogfolder/image_name size %"}
example : {"%img /images/octopress/23 600 300 %"}

Since we cant use the correct syntax, because octopress executed as command, so Please remove the double quotes inside the braces before using the above syntax.

Gist inclusion

If we have more code examples, the preferred is the gist inclusion. Gist is a place where we can store the chunks of code for later use, like the commons rspec for a controllers or ActiveRecord queries etc. It is Free and from github. Go to the ink and create a gist and add to the blog. copy the embeded path starts with the “script src” and paste inside the blog like below

1
<script src="https://gist.github.com/anoobbava/e197d468b7f8d8cc3e404fed9ced1b38.js"></script>

All of configs are not covered here, Please refer the official octopress blog for details. Happy Blogging all of you, dont forget that once you completed, then do the below steps to complete

1
2
3
4
5
rake generate
rake deploy
rake add .
git commit -m 'Completed the blog about the octopress'
git push origin source

Introduction to Circle CI

| Comments

Intro && Setup Project

CircleCI helps you ship better code, faster. To kick things off, you’ll need to add a config.yml file to your project, and start building. After that, we’ll start a new build for you each time make a PR. Similar to travis; here also needed a yml file for configs and update.

Steps

1.Signup using github

  1. Add our Project

  1. Create a folder named .circleci and add a fileconfig.yml (so that the filepath in .circleci/config.yml).

  2. Populate the config.yml with the contents of the below file.

  1. Update the config.yml to reflect your project’s configuration.

  2. Push this change to GitHub.

  3. Start building! This will launch your project on Circle CI , now it will analyse the code and check the system for PR.all done, system will automatically test when make our PR.

Awesome, we got our error on build we can see what is the error.

The issue is we have mentioned is ruby in gem file as 2.3.1 but in the config of circle is 2.4.1. we will update it as another commit.

I Found it, circle CI using docker images pre-built ones, Here we are using the ruby version 2.3.1 in Gemfile and the config.yml added 2.4.1. Going the below url go to circle docs info - most matched version is 2.3; now we are commiting using that code. All work fine.Now we select the image, We can select linux, IOS, or custom host in circle CI, For this tutorial I have used the linux plan, hobbyist one. We can use containers.

Continous Integration Using Travis CI

| Comments

Why Travis CI

Before you start in to our CI, one must understand what is CI and why the CI is going to help us the development and what is a DevOps.

DevOps

  • Is a combination of cultural philosophies.
  • combined to do deviler the products at High Speed.
  • development and operations teams are no longer “siloed.”(AWS)
  • Technology is in path we can minimise the effort and reduce the bugs from the existing system.
  • DevOps help us to achive better results in minimal Time.
  • when Continous Integration and Continous Delivery makes us to reduce the development time.

CI(Continous Integration)

  • Is a development practice.
  • requires developers to share the code to a common repository.
  • Each code update is tested by automated build.
  • if only the automated build is succeeded, then the code is updated to the system.
  • we have Travis CI, Circle CI for this task.

Travis CI intro

  • Simple and powerful tool for the CI.
  • Always free for the Open source repository.
  • Test and deploy with Confidence.(motto)
  • go to Travis
  • facebook and Rails are using this.

workflow

PR work flow

prerequisites

  • Active Github Account.
  • Need to link to Github repo with Travis CI.
  • test coverage for system.

Here we are testing for Ruby on rails.To test our project has test coverage we are using the simplecov gem.Testing using SimpleCov is explained in this link

Back in Action

Next thing what we do is to Login with Github

All the gitHub Repo’s are synched to the Travis-CI.Now Turn ON the Switch against the Repos. We need to update a YML file for travis to automate the testing.There is an online tool to validate the Travis YML using this link.Right now we are discussing only the simple ones for start.

Sample YML

In order to function the Travis and install the depandancies, need a config file. travis.yml is that kind of file will help us to implement that feature. Below is sample file. There are other numerous configs, here is the basic to start and running.

Mentioned only the Ruby and the Version. Also before starting our testing, we need to setup a test database.The reason is we don’t want to test the production dB by any chance. Now comes the script part, we are migrating the database to the latest structure and running the rspecs.I have used the codeclimate.

Why Codeclimate

codeclimate is a code analysis engine will help to check the code has any issues using gems like breakman and rubocop.Also it has built in analysis engine will help us to analyse the code test coverage and also numerous features like badge for our GitHub account. signup using your Github and authorise access codeclimate to our repo. An advantage is that for opensource repo; the codeclimate is free for lifetime, Cool and Awesome right, thanks to codeclimate for their services. Login to codeclimate account and goto our repo, settings tab> Test Coverage. there is a token is present. This token is a link between Travis CI and codeclimate. 
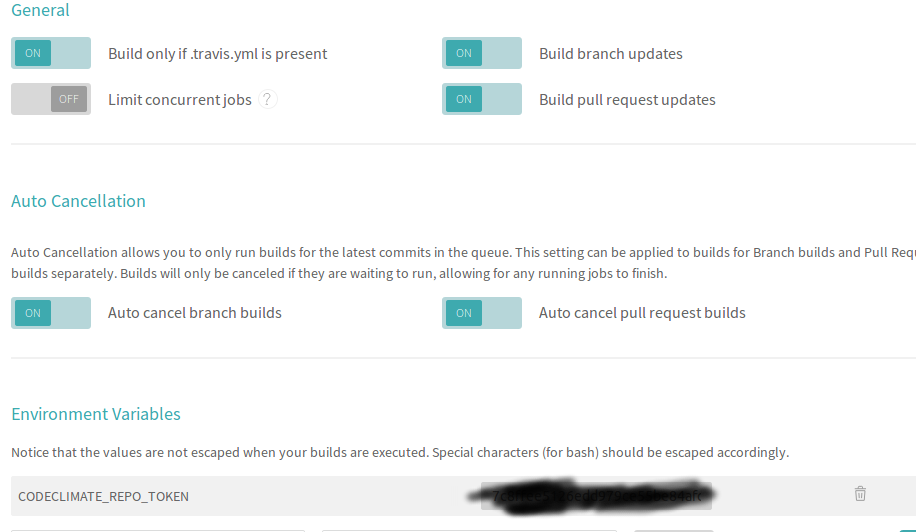
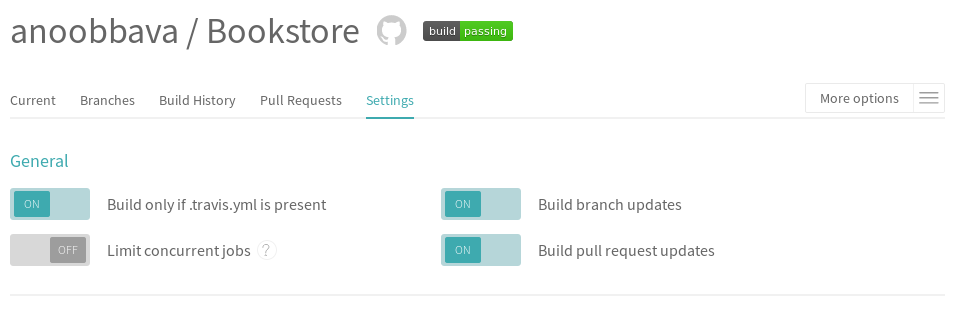
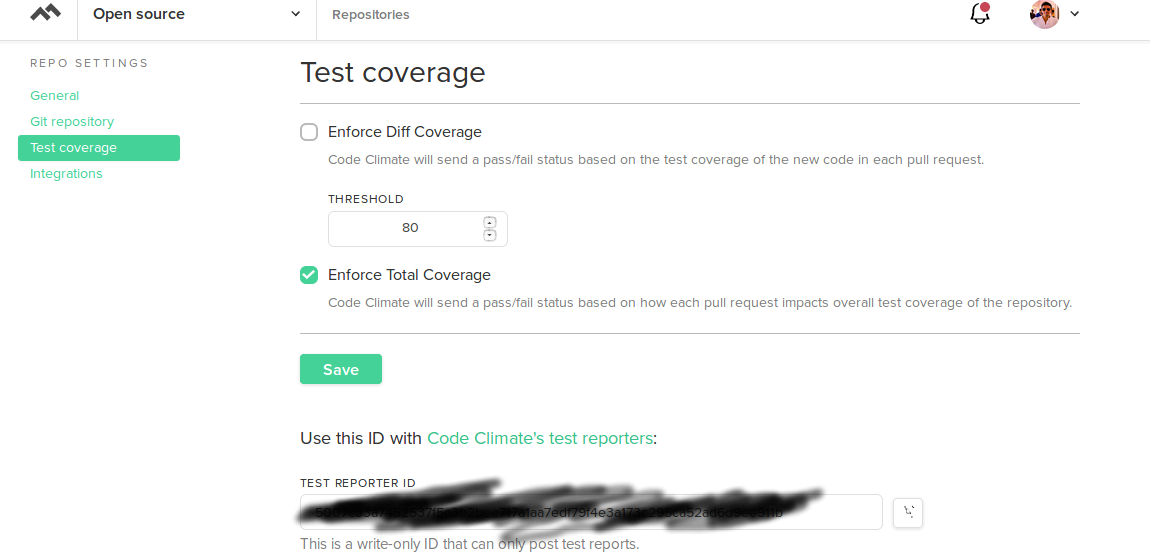
Now see the magic, login to our travis account, goto our project> more options > settings > Environment Variables

create a new environment variable CODECLIMATE_REPO_TOKEN and copy the value from the codeclimate account.

All Set, now only simple task is copy the same token to the .travis.yml file also where XX marked.

note : I am taking the images from my another project for clarity, do not need to confuse with that :D

Dont forget to add this gems our test group.

checkout the below the code if any doubts with the spec_helper.

. Next is commit this code and push to master. We can config the travis to run only at the time of PR(Settings of Travis CI corresponding project). Need to check the settings of the travis-ci of particular repo, like when the build started or start build only when the yml is present like that.

Now it is check-in time.Add the code and made a PR

After made PR, the Travis-CI is analysing the code

we can see the status of PR by clicking on the see details from gitHub page.

Hooray, all success, now we can see the detailed log for details.

Image courtesy: travis