Intro && Setup Project
CircleCI helps you ship better code, faster. To kick things off, you’ll need to add a config.yml file to your project, and start building. After that, we’ll start a new build for you each time make a PR. Similar to travis; here also needed a yml file for configs and update.
Steps
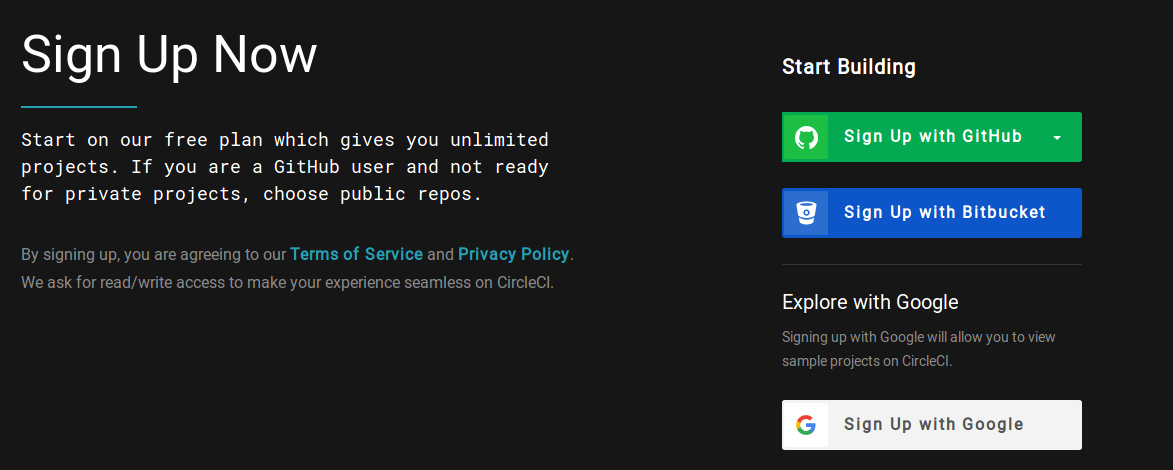
1.Signup using github
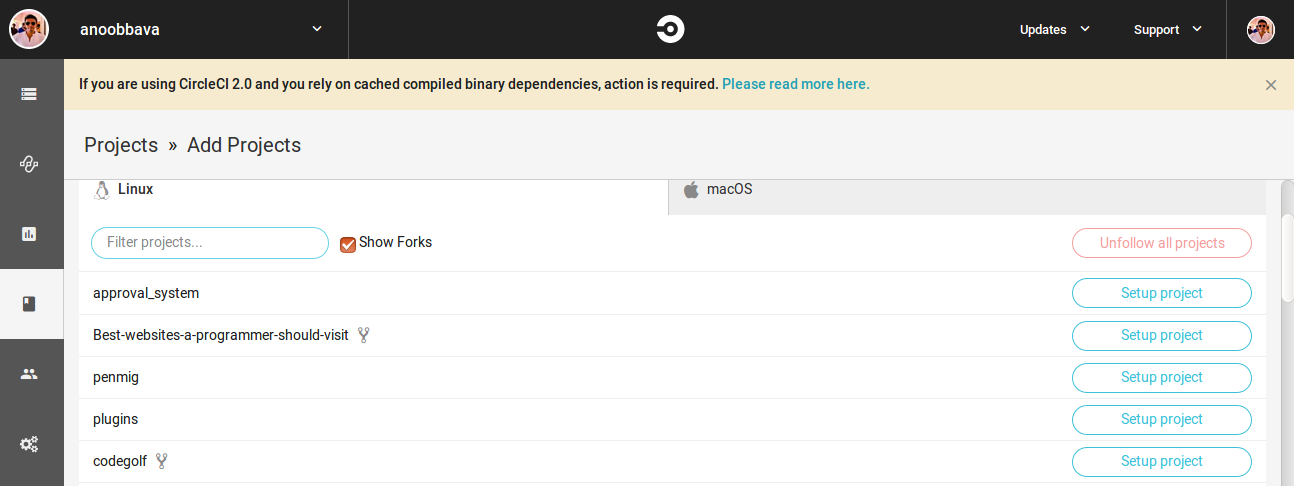
- Add our Project
Create a folder named .circleci and add a fileconfig.yml (so that the filepath in .circleci/config.yml).
Populate the config.yml with the contents of the below file.
Update the config.yml to reflect your project’s configuration.
Push this change to GitHub.
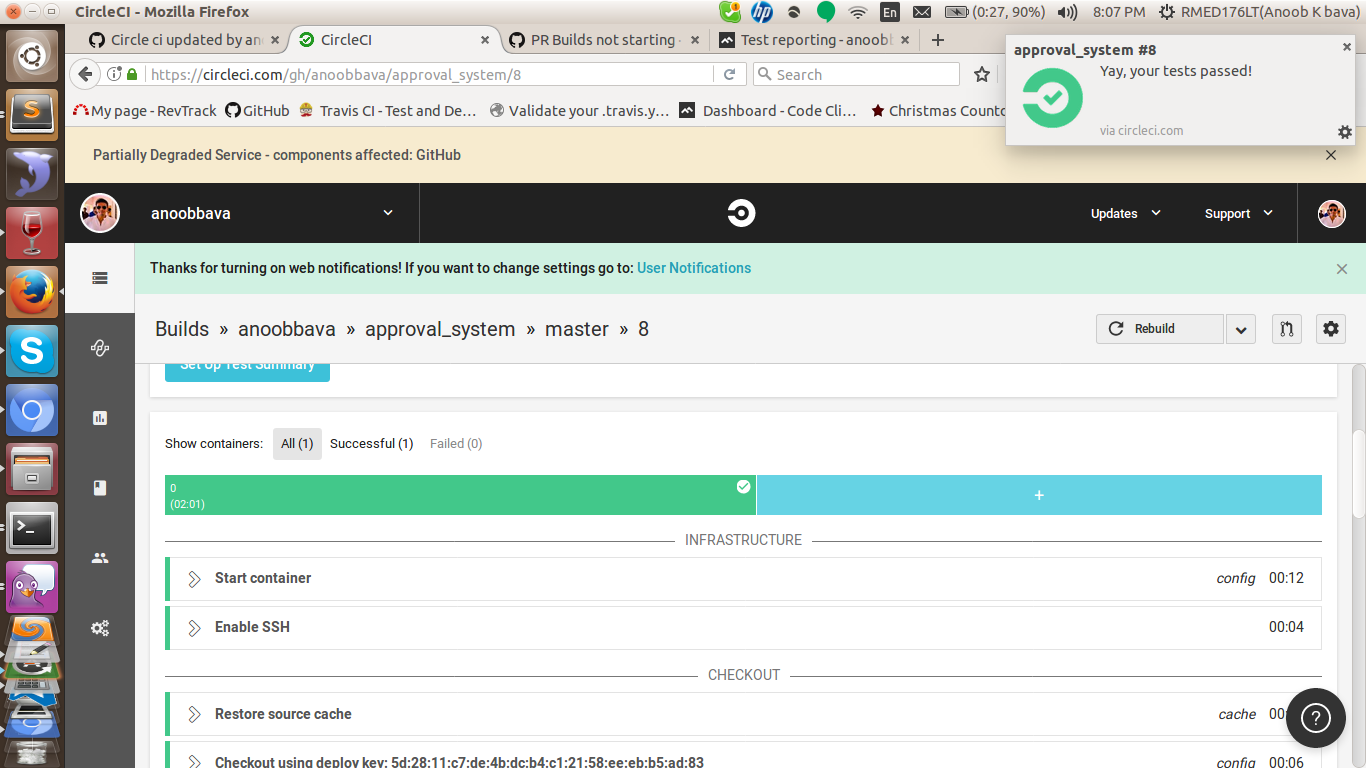
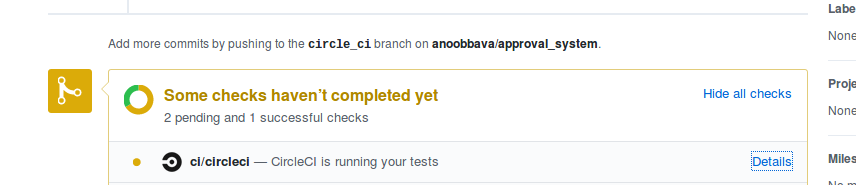
Start building! This will launch your project on Circle CI , now it will analyse the code and check the system for PR.all done, system will automatically test when make our PR.
Awesome, we got our error on build we can see what is the error.
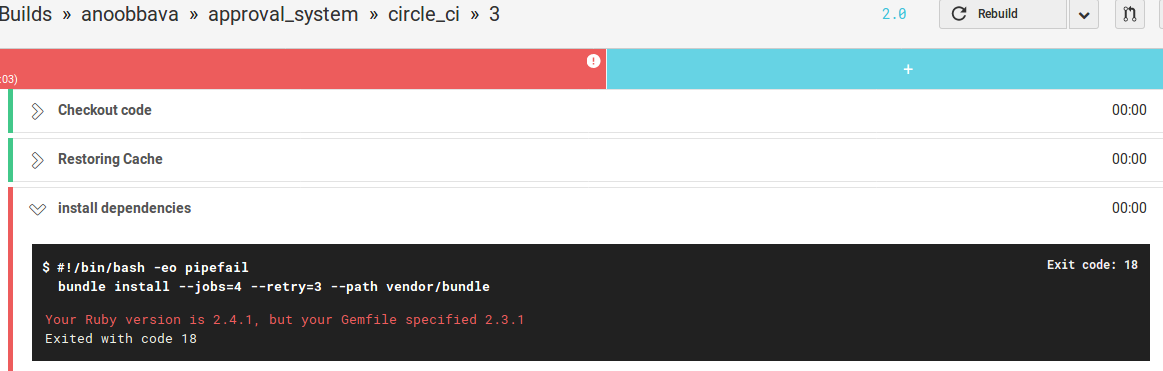
The issue is we have mentioned is ruby in gem file as 2.3.1 but in the config of circle is 2.4.1. we will update it as another commit.
I Found it, circle CI using docker images pre-built ones, Here we are using the ruby version 2.3.1 in Gemfile and the config.yml added 2.4.1. Going the below url go to circle docs info - most matched version is 2.3; now we are commiting using that code. All work fine.Now we select the image, We can select linux, IOS, or custom host in circle CI, For this tutorial I have used the linux plan, hobbyist one. We can use containers.